How to Upload a File to Azure Blob Storage
Azure Blob Storage offers a simple way to store files such as images or JSON data in the cloud. This tutorial will teach you how to write data to Azure Blob Storage from a C# application.
Creating a Storage Account
Before jumping into Visual Studio, we need to create an Azure Storage Account. In the Azure portal, create a new resource and create a Storage Account. It’s usually listed in the list of popular products.
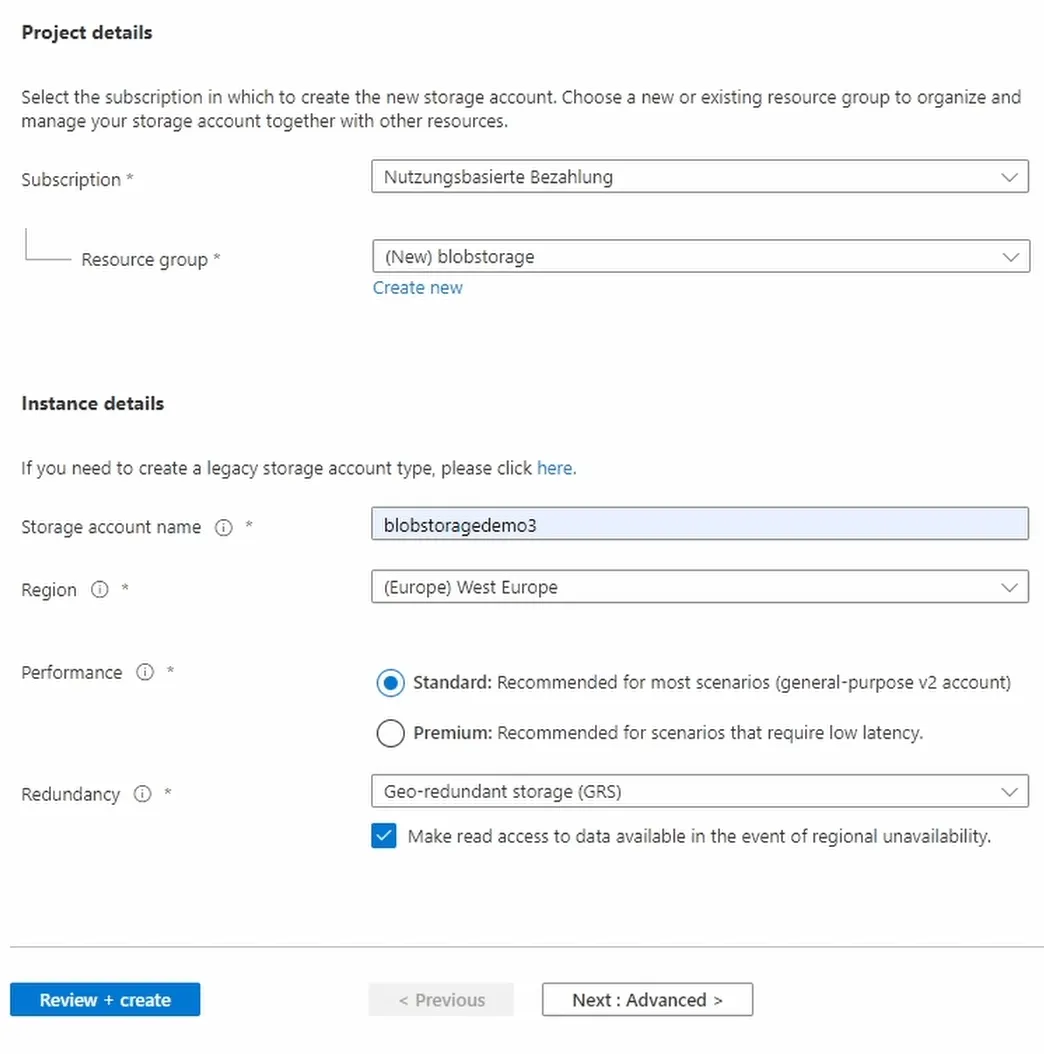
First, select your subscription and resource group. We’re going to create a new resource group and name it blobstorage.

Next, we need to provide a globally unique storage account name. We go with blobstoragedemo3. We choose West Europe as the region and use the standard performance tier. We choose Locally-redundant storage (LRS). Both are the cheapest options at the time of recording this tutorial.
Performance and redundancy are out of the scope of this tutorial. Make sure you understand the differences in terms of cost as I am not responsible for your spending.
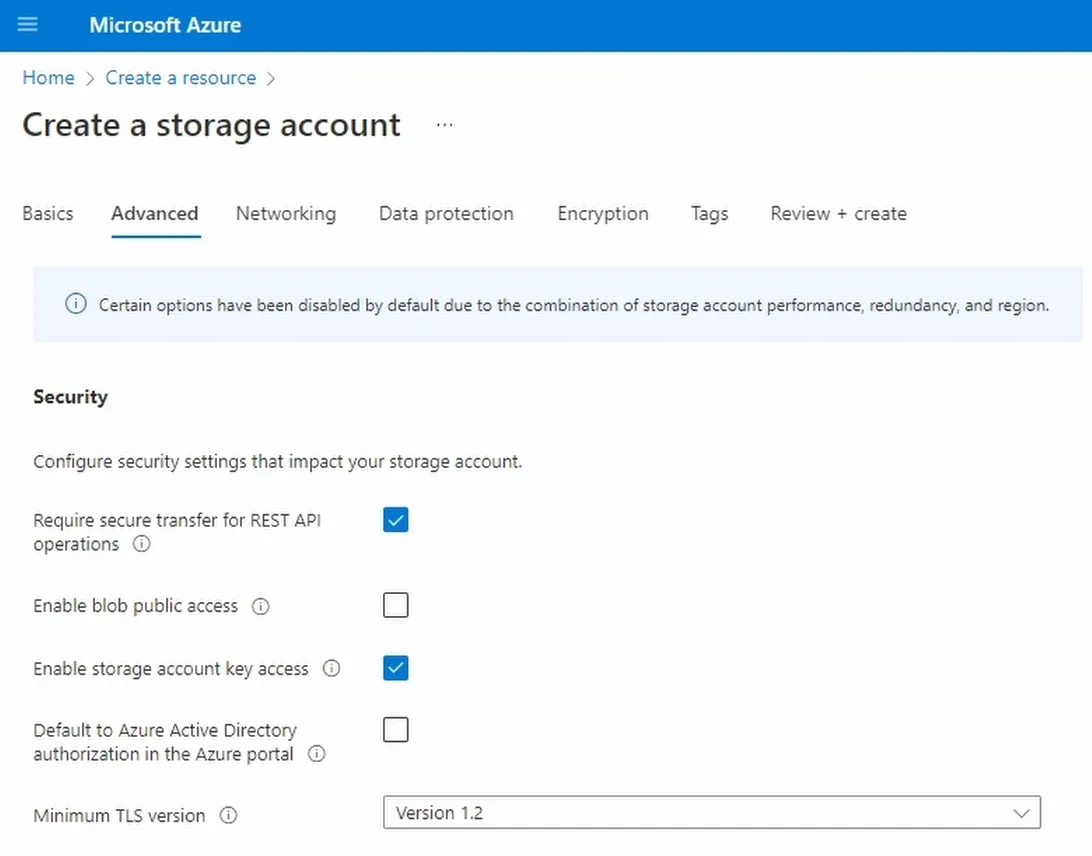
In the Advanced tab, you can enable and disable different options. For example, you can disable the public blob access. That’s what we do for this tutorial. For everything else, we use the default selection.

The other tabs contain additional configuration options that we don’t need to change for this tutorial. We click on the Review & Create button to review our service configuration and create the Azure Storage Account.
Creating a Container
When Azure has completed the operation, we open the container’s menu and create a container that will hold our data.
We click to open the New Container dialog in the toolbar and provide a name. We choose fileupload as the container name. The name has to be unique within the storage account.
We click on Create and wait for Azure to finish the operation.
Before we start development, we open the Access keys menu and click on the Show keys toolbar action. We then copy the connection string of key1 into the clipboard.
Implementing the File Upload
In Visual Studio, I created a C# Console application.
The new .NET 6 project templates use top-level statements. If you aren’t familiar with the new .NET 6 features, watch this video.
First, we open the NuGet package manager and install the Azure.Storage.Blobs package.
After the installation is completed, we open the Program.cs again and define two variables. First, we create a blobStorageConnectionString variable and insert the connection string we copied from the Azure portal.
using Azure.Storage.Blobs;

Console.WriteLine("Starting...");

var blobStorageConnectionString = "DefaultEndpointsProtocol=https;AccountName=blobstoragedemo3;AccountKey=XYZ;EndpointSuffix=core.windows.net";
var blobStorageContainerName = "fileupload";

var container = new BlobContainerClient(blobStorageConnectionString, blobStorageContainerName);
var blob = container.GetBlobClient("nature.jpg");

var stream = File.OpenRead("nature.jpg");
await blob.UploadAsync(stream);

Console.WriteLine("Upload completed.");
Second, we create a blobStorageContainerName variable and assign the container’s name, in our case, fileupload.
Next, we add a using statement for the Azure.Storage.Blobs namespace. Below the variable definitions, we define a container variable and assign an instance of the BlobContainerClient. The first argument is the connection string, and the second argument is the container name.
Next, we create a blob variable and call the GetBlobClient method on the container object. As the only argument, we provide the desired name of the blob.
In this tutorial, I load an image from the hard drive, but you could also use any other stream or string and save it to the blob. I create a stream variable and use the File.OpenRead method and provide the name of the file resource.
Now, we await the blob.UploadAsync method and provide the stream as its argument. This line will finally upload the data onto the storage account.
Running the application
Now let’s build and run the application.
At least we don’t get any exceptions, and the program completes with the “Upload completed” message in the console.
Inspecting the Data in the Azure Portal
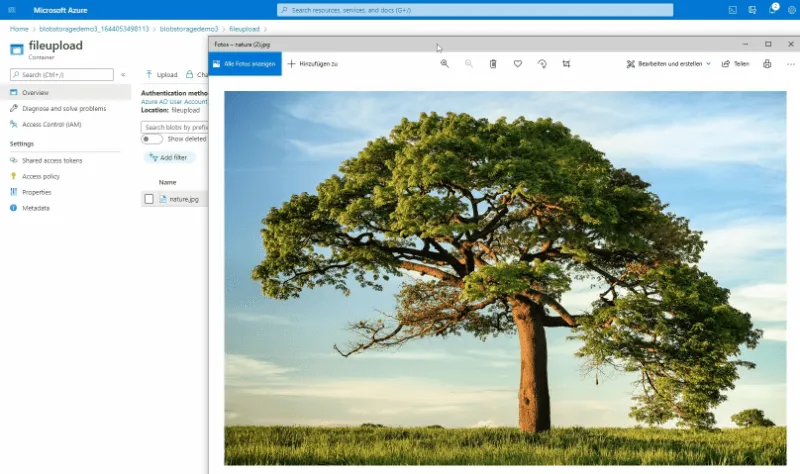
Now that we uploaded the data to the Azure storage account let’s open the Azure portal to verify the upload. Open the container’s menu in the Storage account and click on the fileupload container.
A list with all the blobs appears. We click on the nature.jpg blob to get more details and download it using the toolbar action.

The browser downloads the file to the local disk. I open it, and we see this beautiful image.
What’s Next?
Azure Blob Storage offers more advanced features for different scenarios. You can read about it on the Azure Blob Storage official documentation.
PREMIUM CONTENT
